Core Blocks
Yoko Core adds functionality to some existing core blocks.
Core/LoginLogout Block
Yoko Core adds a few options to the core Login/Logout block to make SSO integration and header customization easier.
To find these settings quickly in Gutenberg:
- Select the Login/Logout block.
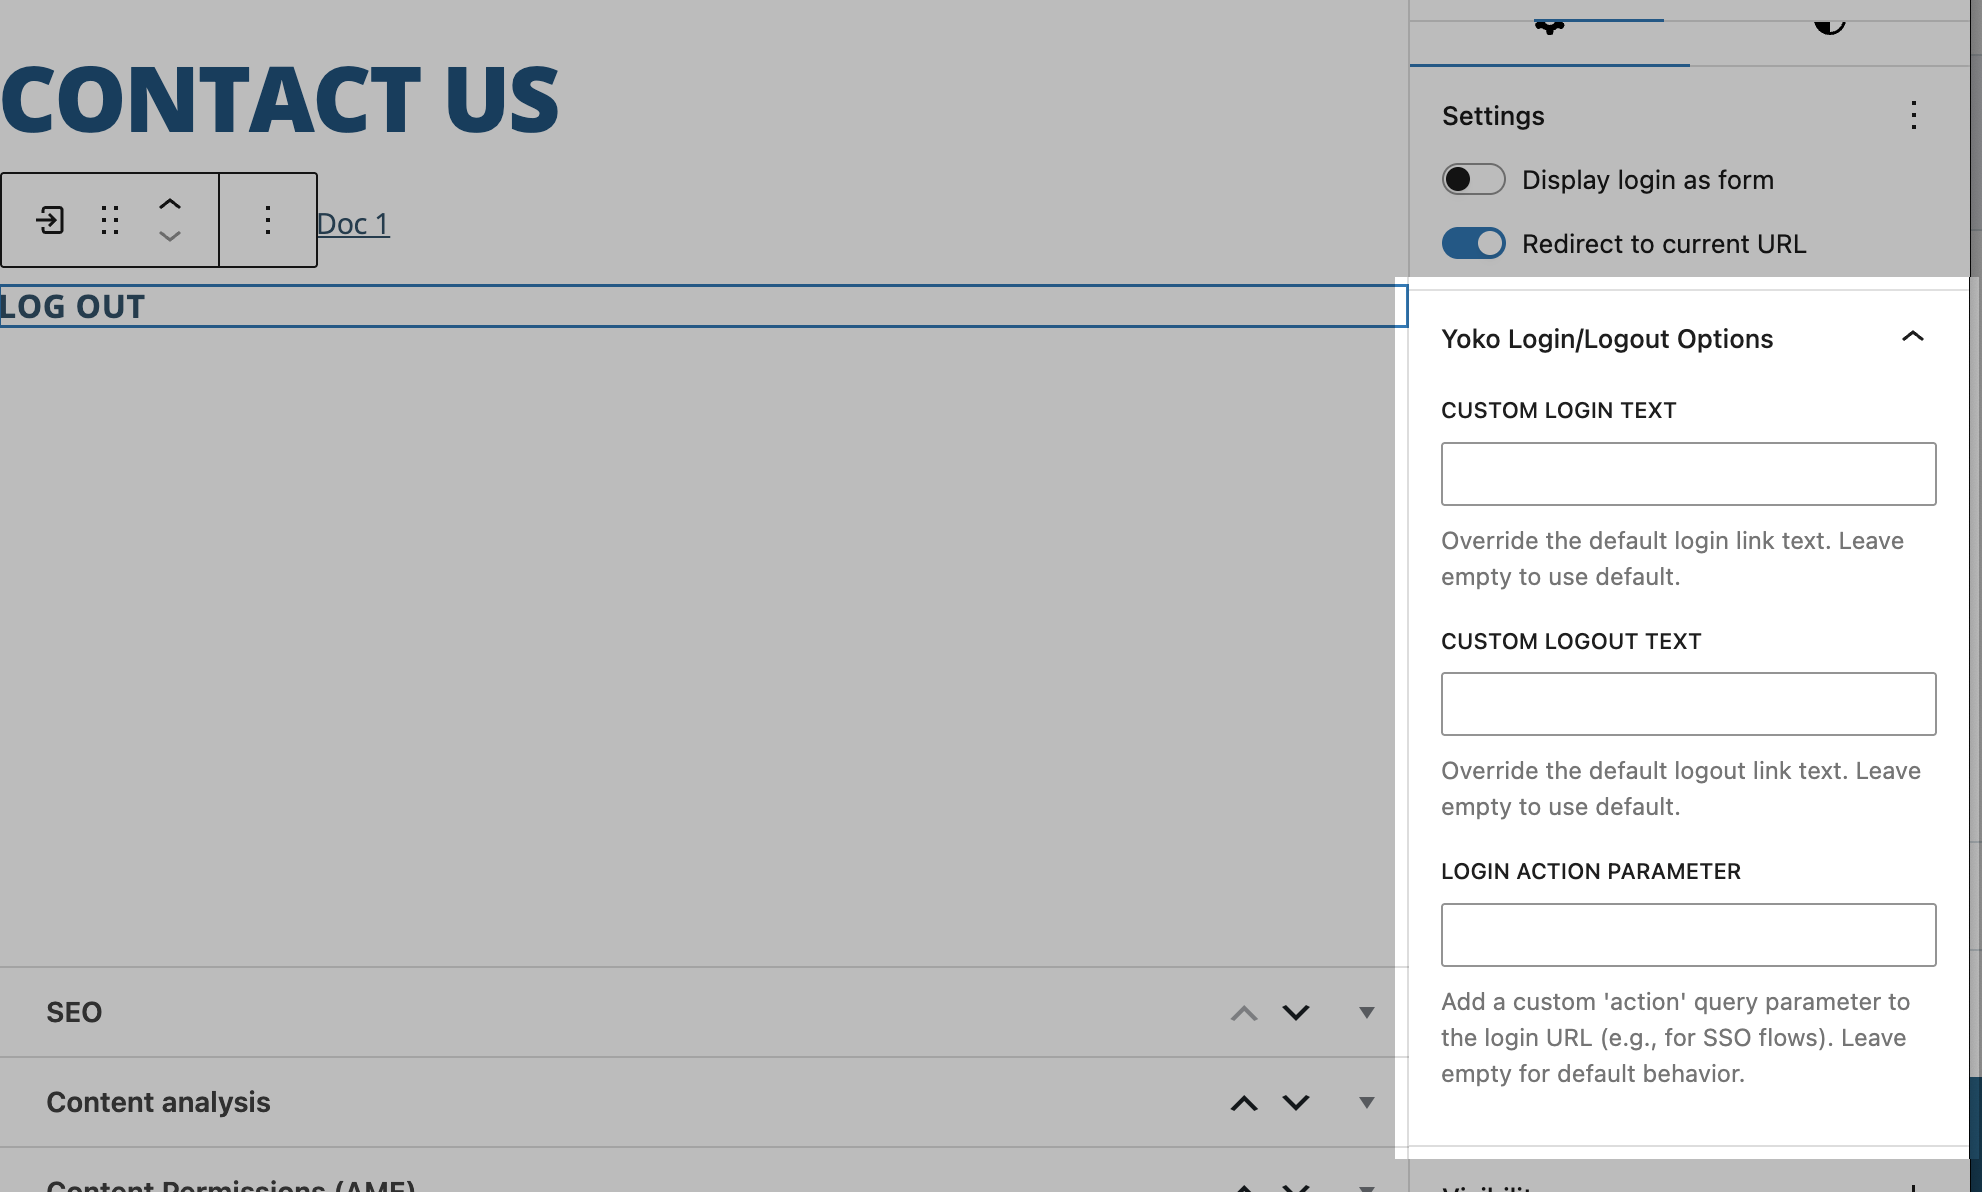
- Open the right sidebar Block settings.
- Open the panel named Yoko Login/Logout Options.
- Turn on Display login as form to reveal Redirect to Referrer.
- Open Styles and choose Block Form to switch to the full-width stacked layout style.
- Custom Login Text - Set custom Login text when the user is logged out.
- Custom Logout Text - Set custom Logout text when the user is logged in.
- Login Action Parameter - ADVANCED FUNCTIONALITY!! - This allows for the button to set a custom
actionparemeter for the login request. Most of our SSO use the same login URL as the main WP Login, but trigger a different login flow based on the action parameter. For example, AMS Connect frequently uses theaction=amsc_loginparameter to trigger its login flow. To link this login button to it's flow, you would just putamsc_logininto the custom action parameter field.
Display Login as Form Mode
When Display login as form is enabled on the core Login/Logout block:
- Custom Login Text, Custom Logout Text, and Login Action Parameter are intentionally ignored.
- Yoko Core instead exposes a Redirect to Referrer toggle in the Yoko block options panel.
Redirect to Referrer
When enabled, Yoko Core uses frontend JavaScript to populate the hidden redirect_to field in the login form using document.referrer, but only if the referrer is on the same domain.
This approach is designed to be cache tolerant and avoids hard-coding a redirect URL at render time.
Block Style: Block Form
Yoko Core also adds a block style named Block Form for the core Login/Logout block.
When this style is selected:
- Form, labels, fields, and buttons are rendered as block-level elements.
- Inputs and controls are set to full width for easier stacked form layouts.
- The remember-me row (
div.login-remember) is kept inline so the checkbox + label display in the expected default inline layout.
The text will only render differently on the front end of the site.
Core/Navigation Block
Show Child Pages
The "Show Child Pages" setting on the core/navigation block will replace the whole menu with the child posts of the current page/post. This is useful for micro-sites or complex posts like large events.
Since all of the navigation links will be replaced by the page children, you can populate this menu in Gutenberg with placeholder menu items so that the template layout looks complete. The first item in the menu will also be used for determining the styles of the child page navigation menu items.;
Options
- Show Child Pages - Turning this on will populate this navigation block with the direct children of the rendered page, ordered by
menu_order. - Show Parent Page - Turning this on will add a link to the navigation menu to the parent page at the very beginning of the menu.
- Parent Page Label - This will be the label of the parent page navigation item. Leave this blank to use the title of the parent page.
Styling
In order to style the block, you can add a custom menu and make all of the configurations you need. As long as this options is set, this block will override that menu with the direct child posts of the displayed post.
The menu item styles will be automatically inherited from the first menu item.
Limitations
As of Yoko Core Version 1.10.0, this feature will only work for top level heirarchical pages and only it's direct descendants. It is not, for example, compatible with grandchildren or Relational Taxonomy children.
Core/Post-Terms Block
Yoko Core extends the core/post-terms block with additional display and formatting options.
No Links
The "No Links" option removes clickable links from terms while maintaining all visual styling. This is useful when you want to display terms as labels without navigation.
How it works:
- Converts anchor tags (
<a>) to span tags (<span>) - Preserves all CSS classes, styles, and data attributes
- Maintains visual consistency with linked terms
Limit Number of Terms
See the 1.17.0 release notes for more information.
The "Limit Number of Terms Rendered?" option controls how many terms are displayed when a post has many terms in a taxonomy. This is particularly useful for post cards with limited space.
Options
-
Limit Number of Terms Rendered? - Toggle to enable term limiting features. When enabled, reveals additional controls.
-
Number of Terms to Render - The maximum number of terms to display before truncating. Default is 3.
-
More Text - Text displayed when terms are truncated. Use
{count}as a placeholder for the number of hidden terms. Default is"+ {count} More".- Example:
"+ {count} More"becomes"+ 5 More"when 5 terms are hidden - Example:
"and {count} others"becomes"and 3 others"when 3 terms are hidden
- Example:
-
Sort Terms By - Determines the order in which terms are displayed before limiting. Options:
- Name (Ascending) - Alphabetical order A-Z (default)
- Name (Descending) - Reverse alphabetical order Z-A
- Count - By post count (terms used most frequently appear first)
-
Show First - Comma-separated list of term names or slugs that should always appear first if they exist. Useful for highlighting important categories.
- Example:
"Featured, Important, Top" - Matching is case-insensitive and works with both term names and slugs
- Example:
How Limiting Works
- All terms are first sorted according to the "Sort Terms By" option
- Priority terms (from "Show First") are moved to the front
- Only the specified number of terms are displayed
- If terms are hidden, the "More Text" is appended with the count of hidden terms
Example Use Cases
Post Cards with Many Categories:
Settings:
- Limit: 3
- Sort: Name (Ascending)
- More Text: "+ {count} More"

Result: "Business, Design, Technology + 4 More"
Highlighting Featured Content:
Settings:
- Limit: 2
- Show First: "Featured, Sponsored"
- Sort: Name (Ascending)

Result: "Featured, Business + 5 More"
(Even if "Featured" would normally be sorted later alphabetically)
Most Popular Tags:
Settings:
- Limit: 5
- Sort: Count
- More Text: "and {count} others"

Result: "wordpress, php, javascript, react, css and 12 others"
(Shows the 5 most-used tags first)
Compatibility
- Works seamlessly with the "No Links" option
- Both features can be enabled simultaneously
- When both are enabled, limiting is applied first, then links are converted to spans
Technical Notes
- The feature parses and rebuilds the block HTML on the server side
- Preserves all term attributes and styling
- Uses case-insensitive matching for "Show First" terms
- Gracefully handles edge cases (no terms, fewer terms than limit, etc.)
Core/Query Block
Query ID Display
Yoko Core exposes the auto-assigned queryId attribute in the block editor's Advanced panel for core/query blocks. This read-only field helps developers identify which query block to target when writing custom PHP filters.
WordPress automatically assigns a unique numeric ID to each query block on a page, but this ID is not visible in the editor by default. This feature surfaces it so developers don't have to inspect the page source to find it.
How to Use
- Add or select a Query Loop block in the editor
- Open the Advanced panel in the block inspector (right sidebar)
- The Query ID field displays the auto-assigned ID
Use Case: Custom Query Filters
When writing PHP filters that target a specific query block, you need the queryId to scope your filter. For example, with the Content Blocks Builder or custom query modifications:
add_filter( 'query_loop_block_query_vars', function( $query, $block ) {
    // Only modify query block with ID 3
    if ( isset( $block->context['queryId'] ) && 3 === $block->context['queryId'] ) {
        $query['post_type'] = 'event';
    }
    return $query;
}, 10, 2 );
The Query ID displayed in the Advanced panel is the value you would reference in your filter.
Technical Notes
- The Query ID is assigned automatically by WordPress when a query block is added to a page
- The field is read-only -- the ID cannot be changed manually
- This is an editor-only feature with no frontend output
- If no Query ID has been assigned yet, an em dash (--) is displayed