Testing Walkthrough
Testing Walkthrough is a WordPress-native UAT (User Acceptance Testing) system for verifying deployments — especially SSO integrations, content protection, and AMS membership flows. Testers click through a list of scenarios on a real page, mark each Pass / Fail / Skip with notes, and results are attributed to their WordPress account so the team can see everyone's progress at a glance.
It replaces the old "shared Google Sheet" UAT process.
How It Fits Together
| Surface | What it does |
|---|---|
[yoko-testing] shortcode | Renders the interactive walkthrough on any page. Editors+ see scenarios; visitors get a login prompt. |
| Yoko Dashboard → Testing Walkthrough | Admin page for pasting the config JSON and viewing all testers' results. Visible only to Yoko team members. |
REST API at /wp-json/yoko/v1/testing/* | Per-tester save/load + team-results endpoint. Cookie-nonce auth. |
User meta yoko_testing_walkthrough_results | Each tester's per-scenario status + notes. |
Option yoko_testing_walkthrough_config | The walkthrough definition (scenarios, phases, test users). |
Activation
Available on every Yoko-managed site automatically — no setup required. Three surfaces, three lifecycles:
| Surface | When it registers |
|---|---|
[yoko-testing] shortcode | Always — cheap, lets accidental insertions render a "not configured" gate screen |
| Yoko Dashboard → Testing Walkthrough admin menu | Always (on admin pages, for Yoko team members) — so you can save a config on a fresh production site without needing CLI access |
/wp-json/yoko/v1/testing/* REST routes | Always on local/staging/dev; on production, only after a config has been saved |
REST registration is the only piece with meaningful per-request cost, so it's the only piece that's lazy. The admin menu is essentially free (one add_submenu_page() call, gated to Yoko users via AdminUI::is_yoko_user()).
Setting Up a Walkthrough
1. Generate the config
Use the sso-uat-generator Claude Code skill to derive scenarios from the project's actual SSO and content-protection setup. It emits a JSON config matching this shape:
{
  "project": {
    "name": "Project Name",
    "stagingUrl": "https://staging.example.com",
    "amsPortalUrl": "https://community.example.com",
    "cpDashboardPath": "/cp/",
    "restrictedPagePath": "/demo-protected-content/"
  },
  "testUsers": [
    { "label": "Test Member", "email": "test@example.com", "password": "..." }
  ],
  "scenarios": [
    {
      "id": "header-logged-out",
      "phase": "header",
      "name": "Header (Logged Out)",
      "startState": "Visit the site logged out",
      "steps": ["Look at the site header"],
      "expectedResult": "Login/Join CTAs are visible"
    }
  ]
}
The shape is permissive — extra fields are stripped during save. Required fields per scenario: id (alphanumeric + _-), name, plus whatever copy you want in steps / expectedResult.
2. Save the config
Navigate to Yoko Dashboard → Testing Walkthrough in WP Admin, paste the JSON into the editor, click Save Configuration.
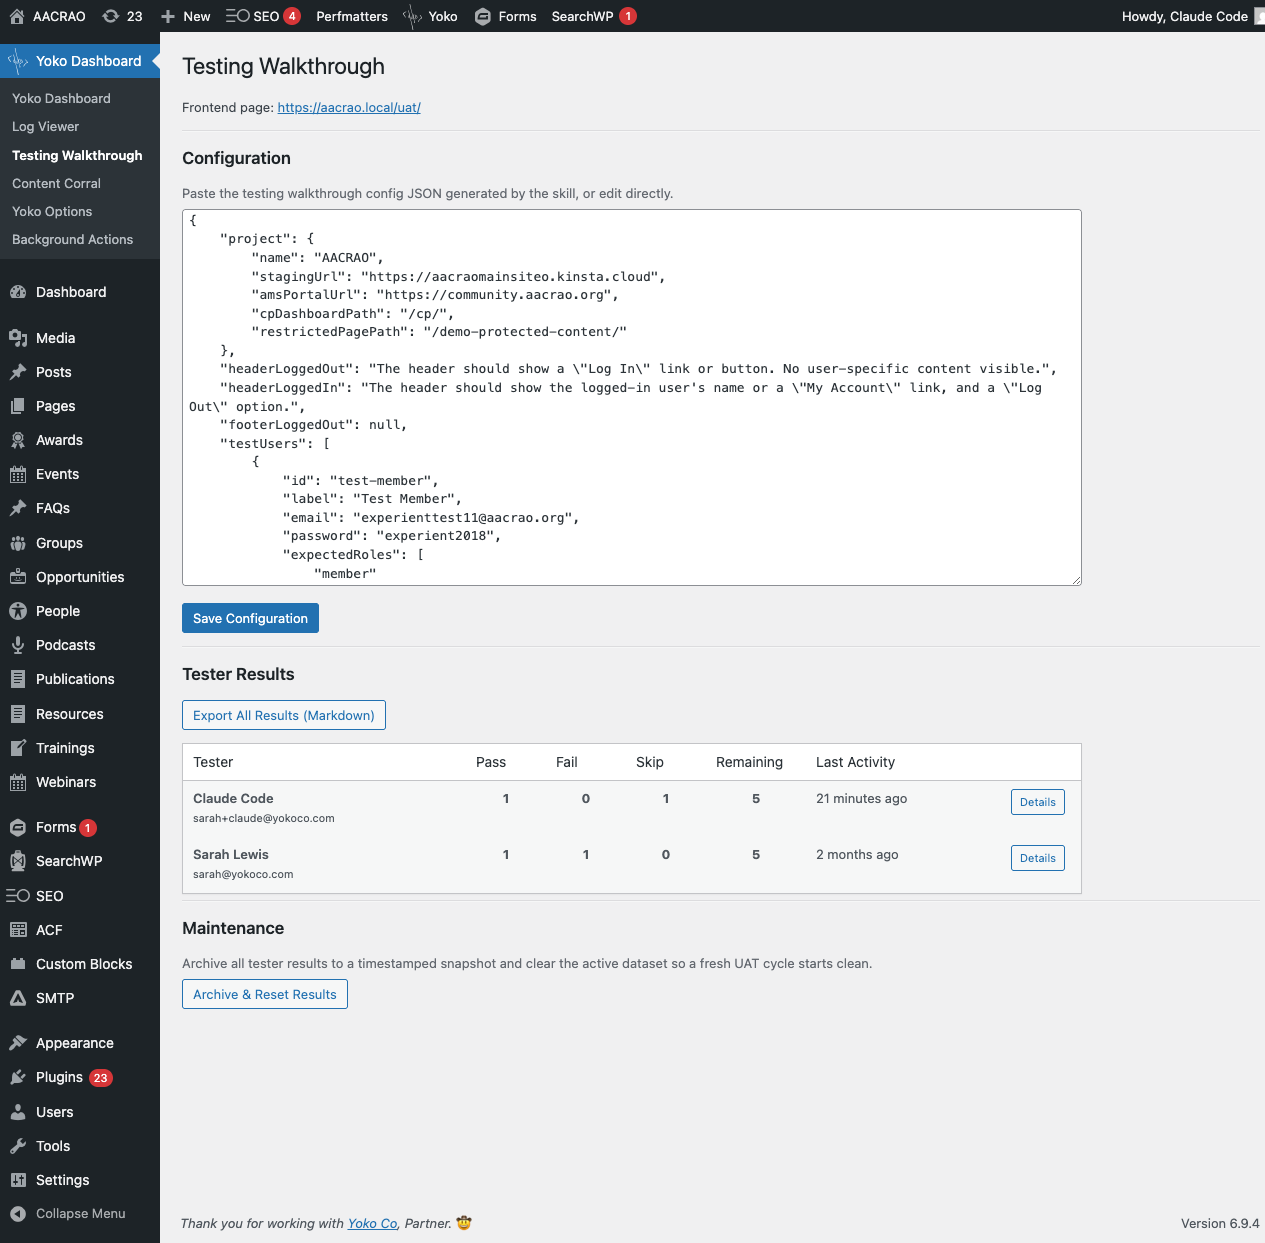
Validation enforces:
- Top-level keys must be one of:
project,scenarios,testUsers,phases,title,description - All strings capped at 5000 characters
- Each
scenarios[*].idmust match/^[a-zA-Z0-9_-]+$/ - Pasting empty JSON clears the option
Saves redirect with a status notice; bad JSON keeps the editor open so you don't lose your input.
3. Create the frontend page
Add a new WordPress page and drop the shortcode:
[yoko-testing]
Editors and above will see the walkthrough; everyone else gets a login prompt. The shortcode automatically renders a privacy notice above the app:
Notes you save are visible to other testers on this site. Do not paste credentials or other sensitive information.
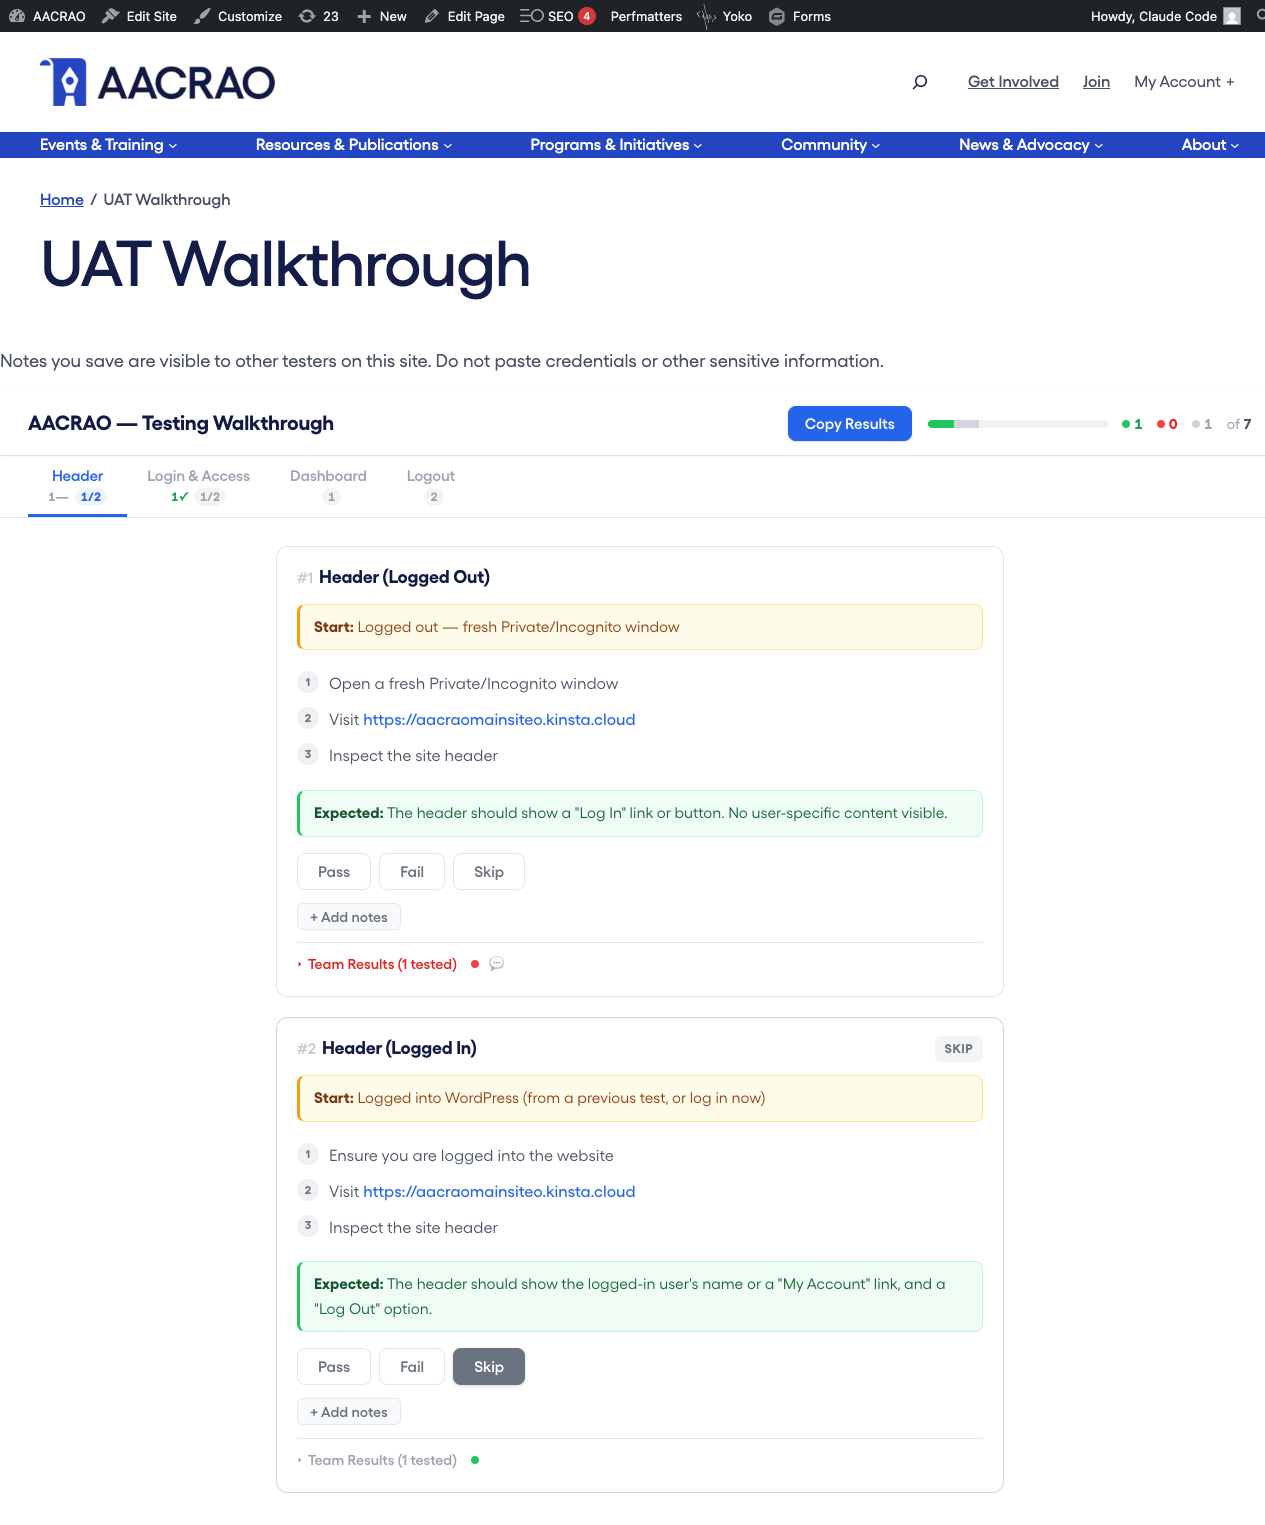
The admin page also shows the resolved frontend URL — clicking it is the fastest way to verify the shortcode is rendering.
Permissions
| Action | Default capability | Filter |
|---|---|---|
| Take the walkthrough (load shortcode, save results) | edit_posts | yoko_testing_walkthrough_test_capability |
| Manage config + view all results | manage_options | yoko_testing_walkthrough_admin_capability |
Override per-site in functions.php or a small mu-plugin:
add_filter( 'yoko_testing_walkthrough_test_capability', function () {
    return 'edit_others_posts'; // editors+ only
} );
The admin submenu also requires the user to be a Yoko team member (AdminUI::is_yoko_user()) — client admins on managed sites won't see the menu item.
Credential Visibility
The testUsers[*].password field is only sent to users with manage_options. Editors and contributors see emails (so they know which account to log in as) but the password is stripped from the localized payload server-side. Pair this with secure password sharing out-of-band for non-admin testers.
Results Dashboard
The admin page shows a table of every tester with their pass / fail / skip counts and the time of their last activity. Each row expands into a per-scenario breakdown showing the tester's notes.
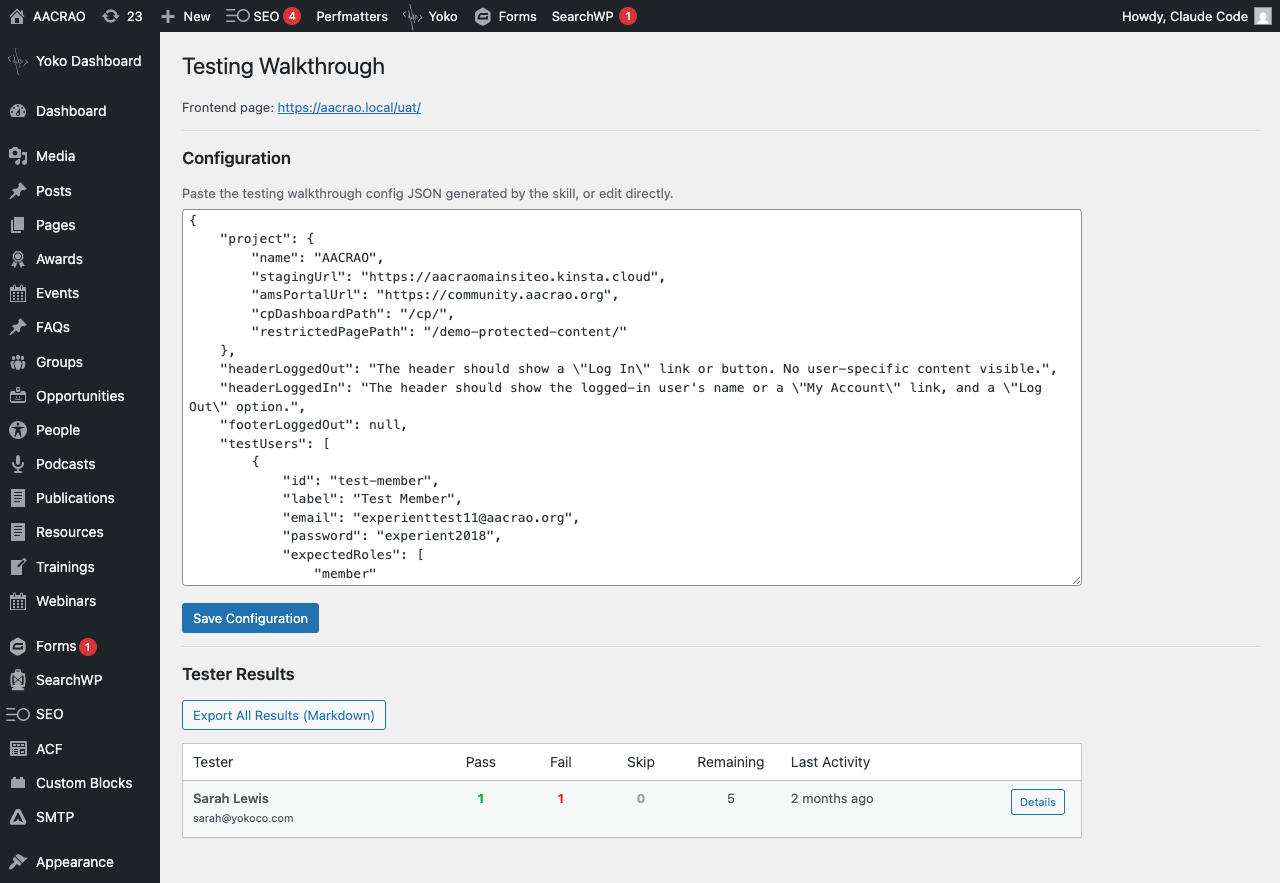
The Export All Results (Markdown) button copies a flat markdown report to the clipboard — handy for pasting into a deploy ticket.
Archive & Reset
When testing for a deployment is done, click Archive & Reset Results under the Maintenance section. This:
- Snapshots every tester's results into a timestamped option (
yoko_testing_walkthrough_archive_<unix-timestamp>) - Deletes the live
yoko_testing_walkthrough_resultsuser meta for all users - Lets you start a fresh round without losing the historical record
Archived snapshots live in wp_options until you remove them manually — useful for post-mortems.
REST API
All endpoints live under /wp-json/yoko/v1/testing/. Auth is the standard WP REST cookie nonce (X-WP-Nonce header) — the shortcode localizes a fresh nonce for the page's JS.
| Method | Path | Permission | Purpose |
|---|---|---|---|
GET | /results | edit_posts | Current user's own results |
POST | /result | edit_posts | Save / update / clear a single result |
GET | /team-results | edit_posts | All testers' display names + per-test status + notes (no emails) |
POST /result accepts:
| Field | Type | Notes |
|---|---|---|
testId | string | Must match /^[a-zA-Z0-9_-]+$/, max 100 chars. Cross-checked against active scenarios[*].id — unknown IDs return 400 |
status | string | null | One of pass, fail, skip, or null to clear |
notes | string | Max 5000 chars |
A per-user cap of 500 stored entries prevents abuse from compromised contributor accounts.
Asset Locations
- CSS:
/wp-content/plugins/yoko-core/assets/css/yoko-testing-walkthrough.css(handles.yoko-testing-*and admin.yoko-testing-admin__*rules) - JS:
/wp-content/plugins/yoko-core/assets/js/yoko-testing-walkthrough.js(frontend) +yoko-testing-walkthrough-admin.js(export + row toggle)
Assets enqueue conditionally — frontend only when [yoko-testing] actually runs, admin only on the Testing Walkthrough screen.
Filters Reference
| Filter | Default | Purpose |
|---|---|---|
yoko_testing_walkthrough_test_capability | 'edit_posts' | Capability required to take the walkthrough |
yoko_testing_walkthrough_admin_capability | 'manage_options' | Capability required to manage config + see all results |
Actions Reference
| Action | Fires | Args |
|---|---|---|
yoko_testing_config_updated | After the canonical persister writes a valid config | array $decoded |
Companion Skills
sso-uat-generator— produces the JSON config from a project's SSO/CP setup. Detects Yoko Core and uses the shortcode flow.sso-content-dashboard— generates a separate Block Visibility–based content-protection testing dashboard. Different tool for a related job; use when you need block-level role-gated test cards rather than scenario-style walkthroughs.
Data Model
wp_options
├── yoko_testing_walkthrough_config            ← active walkthrough definition (array)
└── yoko_testing_walkthrough_archive_<ts>      ← snapshots from Archive & Reset (one per archive)

wp_usermeta
└── yoko_testing_walkthrough_results (per user) ← { [testId]: { status, notes, updated } }
Identifier names are stable across releases — yoko-core v1.20.2 inherited these from the previous (single-client) implementation in yoko-aacrao-custom, and existing data continues to load without migration.